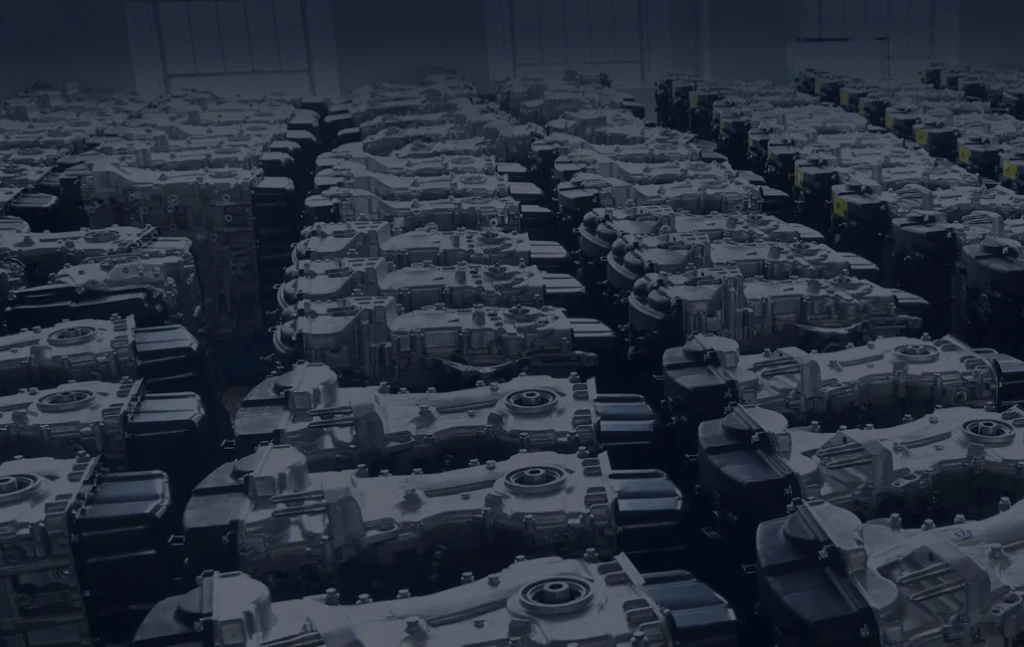






Rebuilding an engine with a short block can be an effective and cost-efficient way to restore or enhance the performance of your vehicle. A short block engine includes key components like the engine block, crankshaft, pistons, and rods, but leaves out the cylinder head and valve train, which allows for greater flexibility in customization.
This guide will walk you through the essential steps of rebuilding an engine using a short block, from selecting the right components to ensuring proper installation and maintenance.
Preparation for Rebuilding an Engine
Tools and Equipment
Essential Tools
A successful ls engine rebuild starts with the right tools. You need a socket set, wrenches, screwdrivers, and pliers. These tools help remove and install engine parts. A torque wrench is important for tightening bolts to the correct specification. You also need a breaker bar for stubborn fasteners. A set of feeler gauges checks clearances. A sturdy engine stand supports the ls engine during the rebuild process.
Specialty Tools
Some tasks require specialty tools. An ls harmonic balancer puller removes the balancer safely. A piston ring compressor helps install pistons into the short block. An engine hoist lifts the ls engine out of the vehicle. A dial indicator checks end play and runout. A micrometer measures bearing clearances. These tools make the ls rebuild easier and more accurate.
Workspace and Safety
Cleanliness Tips (No Towels)
Cleanliness is critical when working with ls engine parts. Avoid using towels, as they leave lint and fibers that can damage the engine. Use lint-free wipes or compressed air to clean surfaces. Keep the workspace free of dust and debris. Always wash hands before handling ls engine parts. Clean tools before use.
Organization
Organize all ls parts and tools before starting the rebuild. Label containers for bolts, nuts, and small engine parts. Use trays or magnetic mats to keep ls parts sorted. Lay out tools in an orderly fashion. This helps you find what you need quickly and reduces mistakes during the ls engine rebuild.
Parts and Supplies
Gaskets and Fluids
You need new gaskets for the ls engine rebuild. Gaskets seal the engine and prevent leaks. Choose quality gaskets for the cylinder heads, intake, and exhaust. You also need engine oil, coolant, and assembly lube. These fluids protect ls engine parts during startup.
Replacement Options
Inspect all ls engine parts for wear or damage. Replace worn parts with new or remanufactured options. Common replacement parts include bearings, seals, and timing components. Some ls engines are beginner-friendly and cost-effective, making them ideal for a first rebuild. Always check compatibility before ordering parts.
| Prep Task | Why It Matters |
|---|---|
| Labeling parts | Prevents confusion |
| Clean workspace | Reduces risk of contamination |
| Safety gear | Protects you from injury |
| Double-checking specs | Ensures proper fit and function |
Engine Disassembly and Inspection
Removing the Engine
Removing the engine is the first step in the rebuild process. Start by disconnecting the battery to prevent electrical hazards. Drain all fluids from the engine, including oil and coolant. Remove the intake and exhaust manifolds.
Disconnect wiring harnesses and fuel lines. Use an engine hoist to lift the engine out of the vehicle. Secure the engine on a stand for easy access. Take your time and check for hidden bolts or brackets. Careful removal protects parts from damage and makes the rebuild easier.
Labeling and Organizing Parts
Proper labeling and organization are essential for a successful engine rebuild. As you remove parts, place them in labeled containers or bags. Write the location and function of each part on the label. Use trays or magnetic mats to keep bolts and small parts sorted. Keep similar parts together, such as fasteners from the cylinder heads or intake manifold. This method prevents mix-ups and lost parts.
Inspecting Components
Heads and Valvetrain
Inspect the cylinder heads and valvetrain carefully. Look for cracks, warping, or signs of wear. Check the valve springs, retainers, and rocker arms for damage. Clean all parts with lint-free wipes. Measure the heads for flatness using a straightedge. If you find damage, consider replacing the affected parts. Proper inspection ensures the engine will run smoothly after the rebuild.
Fasteners and Hardware
Examine all fasteners and hardware. Look for stripped threads, corrosion, or stretching. Replace any damaged fasteners. Clean bolts and nuts before reuse. Use a thread chaser to restore threads if needed. Organize fasteners by size and location. This step prevents problems during reassembly and keeps the engine secure.
Common Pitfalls
Many people make mistakes during engine disassembly that can cause problems later in the rebuild. Knowing these common pitfalls helps you avoid setbacks and ensures a smoother process.
1. Poor Labeling and Organization
Failing to label parts or keep them organized leads to confusion during reassembly. Bolts and small components often look similar but may have different lengths or thread pitches. Mixing them up can cause damage or improper fit.
2. Rushing the Disassembly
Some try to take apart the engine too quickly. This can result in broken connectors, stripped bolts, or lost hardware. Take your time and follow a step-by-step approach.
3. Skipping Inspection
Not inspecting each part carefully is a major mistake. Worn or damaged components may go unnoticed. This can lead to engine failure after the rebuild. Always check for cracks, wear, and other signs of damage.
4. Using the Wrong Tools
Using incorrect tools can damage fasteners or parts. For example, using pliers instead of the correct socket may round off bolt heads. Always use the right tool for each job.
5. Ignoring Cleanliness
Dirt and debris can enter the engine during disassembly. Even small particles can cause wear or block oil passages. Avoid using towels that leave lint. Use lint-free wipes and keep the workspace clean.
6. Forgetting to Document Steps
Not taking photos or notes during disassembly makes reassembly harder. You may forget the order of parts or how certain components fit together. Simple documentation saves time and prevents mistakes.
| Pitfall | Consequence | Prevention Tip |
|---|---|---|
| Poor labeling | Confusion, wrong assembly | Label and bag all parts |
| Rushing | Broken or lost parts | Work slowly and carefully |
| Skipping inspection | Missed damage, engine issues | Inspect every component |
| Wrong tools | Damaged fasteners | Use correct tools |
| Ignoring cleanliness | Engine contamination | Use lint-free wipes, clean area |
| No documentation | Reassembly errors | Take photos and notes |
Short Block Cleaning and Prep
Inspecting the Short Block
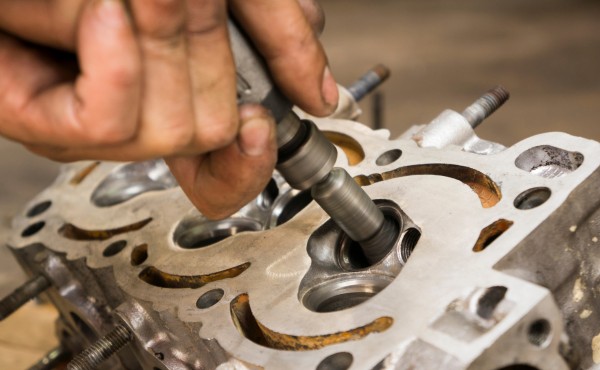
Careful inspection of the short block is a crucial step in any engine rebuild. Start by checking the exterior for signs of damage or defects. Look for cracks, dents, or unusual marks on the block. Examine the main bearing caps and the crankshaft for proper alignment.
Use a flashlight to inspect the cylinder bores. Make sure there is no visible scoring or pitting. Rotate the crankshaft by hand to check for smooth movement. If you notice resistance or rough spots, investigate further. Take notes on any issues you find. This helps you plan the next steps in the rebuild.
Cleaning Methods
Cleanliness is essential for a successful engine rebuild. Avoid using towels, as they leave lint and fibers that can harm the engine. Choose lint-free wipes or compressed air to remove dust and debris. Use a soft brush to clean tight spaces. If the short block has oil or grease buildup, apply a degreaser and rinse with water.
Dry the block with lint-free cloths or compressed air. Make sure all oil passages are clear. Blocked passages can cause engine failure. Clean the crankshaft, pistons, and connecting rods with care. Remove any old gasket material from surfaces. A clean short block ensures proper assembly and reliable engine performance.
| Cleaning Tool | Purpose |
|---|---|
| Lint-free wipes | Remove dust and debris |
| Compressed air | Blow out oil passages |
| Soft brush | Clean tight spaces |
| Degreaser | Remove oil and grease |
Checking for Damage
After cleaning, check the short block for hidden damage. Inspect the cylinder bores for cracks or excessive wear. Look at the crankshaft journals for scoring or discoloration. Examine the connecting rods for bends or fractures.
Check the main bearing surfaces for signs of pitting or uneven wear. If the short block was shipped to you, look for shipping damage such as dents or scratches. Use a straightedge to check for warping on the deck surface. If you find any defects, decide whether to repair or replace the affected parts. Careful inspection prevents problems during the engine rebuild.
Crankshaft Settling
Crankshaft settling is an important step in the engine rebuild process. After cleaning and inspecting the short block, the crankshaft must be allowed to settle into its bearings. This step helps ensure proper alignment and reduces the risk of binding or uneven wear when the engine runs.
When a short block arrives from the manufacturer or machine shop, the crankshaft may have shifted slightly during shipping or handling. The engine builder must rotate the crankshaft several times by hand. This action allows the crankshaft to find its natural position within the main bearings. It also helps distribute assembly lube evenly across the surfaces.
To settle the crankshaft, follow these steps:
- Place the short block securely on the engine stand.
- Confirm that all main bearing caps are torqued to specification.
- Apply assembly lube to the main journals if not already done.
- Rotate the crankshaft slowly by hand. Complete at least ten full revolutions.
- Listen and feel for any resistance or unusual noises.
Component Installation
Pistons and Rods Orientation
Bearing Clearance
Correct bearing clearance is essential for a reliable engine. The clearance allows oil to flow between moving parts and prevents metal-to-metal contact. Too much clearance can cause low oil pressure and noisy operation. Too little clearance can lead to overheating and damage.
To check bearing clearance, use a tool called Plastigage. Place a strip of Plastigage on the crankshaft journal, then install the bearing cap and torque it to the specified value. Remove the cap and measure the width of the flattened Plastigage. Compare this measurement to the specifications in your manual. If the clearance is outside the recommended range, replace the bearings or have the crankshaft machined.
Proper Orientation
Proper orientation of pistons and rods is critical. Each piston has a specific direction it must face inside the engine. Most pistons have a mark or notch that should point toward the front of the engine. The connecting rods also have an orientation. The chamfered edge of the rod usually faces the crankshaft journal fillet.
Install each piston and rod assembly carefully. Use a piston ring compressor to fit the parts into the cylinder. Make sure the rings are staggered according to the instructions. This prevents oil from leaking past the rings.
Camshaft and Timing Set
Camshaft Install
The camshaft controls the opening and closing of the engine’s valves. Before installation, coat the camshaft lobes and journals with assembly lube. Slide the camshaft gently into the block, supporting its weight to avoid scratching the bearings.
Once the camshaft is in place, install the thrust plate or retainer. Torque it to the specified value. Rotate the camshaft by hand to ensure it moves freely. If you feel resistance, stop and check for misalignment or debris.
Timing Alignment
Proper timing alignment ensures the engine’s valves open and close at the right moments. Most engines use timing marks on the camshaft and crankshaft gears. Align these marks according to the manual. This step is vital for engine performance and longevity.
After installing the timing set, rotate the engine by hand two full revolutions. Recheck the timing marks. If they do not line up, repeat the process. Accurate timing prevents engine misfires and damage.
Oiling System
Oil Pump
The oil pump circulates oil through the engine, lubricating all moving parts. Before installation, prime the oil pump by filling it with engine oil. This step prevents dry starts during the first engine run.
Mount the oil pump to the block and torque the bolts to specification. Some pumps require alignment with the crankshaft or intermediate shaft. Follow the instructions for your engine.
- Fill the oil pump with oil before installation.
- Align the pump with the drive shaft or crankshaft.
- Torque bolts to the correct value.
A properly installed oil pump protects the engine from wear and overheating.
Pickup Tube
The pickup tube draws oil from the oil pan and delivers it to the pump. Attach the pickup tube to the oil pump using the correct fasteners. Make sure the tube is fully seated and the O-ring or gasket is in place.
Position the pickup tube so it sits just above the bottom of the oil pan. Too high or too low can cause oil starvation. Tighten all fasteners securely.
Careful installation of the oiling system ensures all engine parts receive proper lubrication. This step is vital for a successful rebuild and long engine life.
Cylinder Heads and Valvetrain
Head Gaskets
Head gaskets play a vital role in sealing the engine. They sit between the cylinder head and the short block. The gasket prevents leaks of coolant, oil, and combustion gases. Before installation, inspect the surface of the block and the cylinder head.
Both surfaces must be clean and free of old gasket material. Use lint-free wipes to clean these areas. Place the new gasket on the block, making sure it aligns with the holes for coolant and oil passages.
Many engines use dowel pins to help position the gasket. If your engine has these pins, fit the gasket over them. Check that the gasket does not shift out of place. Proper placement ensures a tight seal and prevents leaks. Always use a new gasket during a rebuild. Reusing old gaskets can cause problems later.
Torquing Heads
Torquing the cylinder heads is a critical step in the rebuild process. The cylinder head bolts must be tightened in a specific sequence. This sequence helps distribute pressure evenly across the gasket. Start by placing the cylinder head onto the block. Insert the bolts and hand-tighten them.
Use a torque wrench to tighten the bolts to the manufacturer’s specification. Follow the recommended pattern, usually starting from the center and moving outward. Tighten each bolt in stages. For example, first tighten all bolts to a low setting, then increase the torque for the next round. This method prevents warping of the cylinder head.
Avoiding Common Mistakes
Many builders make errors during the installation of cylinder heads and valvetrain. These mistakes can affect the performance and reliability of the engine. Knowing what to avoid helps ensure a successful rebuild.
Common Mistakes:
- Improper Cleaning
Dirt or old gasket material left on surfaces can cause leaks. Always clean all parts before assembly. - Incorrect Gasket Placement
Misaligned gaskets block oil or coolant passages. Check alignment before installing the cylinder head. - Skipping Torque Sequence
Tightening bolts out of order can warp the cylinder head. Follow the correct pattern every time. - Reusing Old Bolts or Gaskets
Old bolts may not hold the correct torque. Used gaskets often fail to seal. Replace these parts during every rebuild. - Too Smooth Cylinder Walls
Cylinder walls that are polished too much can prevent proper ring seating. Make sure the surface has the correct finish. - Neglecting Lubrication
Failing to apply assembly lube to moving parts increases wear. Lubricate all parts before installation.
Engine Rebuild: Clearances and Torque
Measuring Clearances
Plastigage Use
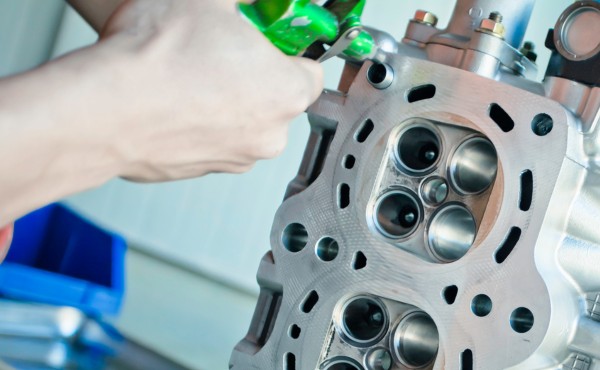
Measuring clearances is a key step in any engine rebuild. Proper clearances help the engine run smoothly and prevent damage to moving parts. One common tool for this job is Plastigage. This tool checks the space between bearings and journals.
To use Plastigage, cut a small piece and place it on the clean surface of the crankshaft journal. Install the bearing cap and torque it to the correct value. Remove the cap and compare the width of the squashed Plastigage to the scale on the package. This measurement tells you if the clearance is within the safe range for your engine.
Spec Reference
Every engine has specific clearance values. These numbers are found in the service manual. Compare your Plastigage results to these specs. If the clearance is too tight, the engine may seize. If it is too loose, oil pressure drops and parts wear out faster.
Write down each measurement. Check all main and rod bearings during the engine rebuild. Accurate clearances protect the engine and help all parts work together.
Torque Sequence
Correct torque is vital for engine rebuild success. Each bolt must be tightened to a specific value and in a certain order. The torque sequence prevents warping and ensures even pressure on all parts. Use a torque wrench for this step.
Start with the center bolts and work outward in a spiral pattern. Tighten bolts in stages, such as 30 ft-lbs, then 50 ft-lbs, then the final value. This method helps the engine block and cylinder heads seat properly.
Double-Check Work
Double-checking your work is the last line of defense in an engine rebuild. Go back over each step before final assembly. Confirm all clearances match the specs. Make sure every bolt is torqued to the correct value. Inspect all parts for dirt or damage. Check that all moving parts turn freely by hand. This careful review catches mistakes before they cause engine failure.
- Review all measurements and torque values.
- Inspect all parts for proper fit.
- Turn the crankshaft by hand to check for smooth movement.
- Confirm all tools and parts are put away safely.
Engine Reassembly and Startup
Final Assembly Steps
Final assembly brings together all engine parts for a complete rebuild. Begin by installing the intake manifold, exhaust manifold, and accessory brackets. Attach sensors and wiring harnesses. Secure the oil pan and valve covers. Use a torque wrench for all bolts.
Check each part for proper fit and alignment. Install the cooling system components, including the water pump and thermostat. Connect fuel lines and hoses. Make sure every part is clean and free of debris. Double-check that all gaskets are in place. Use a checklist to track each step. This process ensures the engine is ready for startup.
Priming Oil System
Priming the oil system protects engine parts during the first startup. Fill the oil filter with fresh oil. Install the filter onto the engine. Add the recommended amount of oil to the crankcase. Use a priming tool or a drill to spin the oil pump.
This action circulates oil through the engine before it runs. Watch for oil at the rocker arms or pushrods. If you see oil, the system is primed. If not, check for blockages or leaks. Priming prevents dry starts and reduces wear on moving parts.
| Step | Action | Result |
|---|---|---|
| Fill oil filter | Add oil before installation | Faster oil flow |
| Prime oil pump | Spin with tool or drill | Oil reaches engine parts |
| Check for oil flow | Inspect at rocker arms | Confirms priming |
Pre-Start Checklist
A pre-start checklist helps prevent mistakes and protects the engine. Review each item before starting the engine for the first time.
- Confirm all bolts are torqued to specification.
- Check that all parts are installed and connected.
- Inspect for leaks at gaskets, hoses, and fittings.
- Verify oil and coolant levels.
- Make sure the battery is fully charged.
- Confirm the ignition system is connected.
- Ensure the fuel system is pressurized and free of leaks.
- Rotate the engine by hand to check for smooth movement.
- Remove any tools or foreign objects from the engine bay.
First Startup and Break-In
The first startup is a critical moment in any engine rebuild. Before turning the key, review the pre-start checklist once more. Confirm that all parts are installed correctly and that fluids are at proper levels. Remove any tools or foreign objects from the area. The engine must rotate freely by hand. If you feel resistance, stop and inspect the parts for issues.
Start the engine and let it idle. Watch the oil pressure gauge closely. If oil pressure drops or does not register, shut off the engine immediately. Listen for unusual noises such as knocking or ticking. These sounds may indicate problems with internal parts. Check for leaks at gaskets, hoses, and fittings. Inspect the area around the engine for signs of fluid escaping.
During break-in process, keep the engine at idle for a few minutes. Allow oil to circulate through all parts. Increase the speed gradually. Avoid high RPMs or heavy loads during the first hour. The break-in process helps new parts seat properly and ensures smooth operation. Change the oil and filter after the first 30 minutes. This step removes debris and particles from the rebuild.
Troubleshooting
Troubleshooting is an important skill for anyone completing an engine rebuild. Problems can appear during startup or break-in. Quick action prevents damage to parts and saves time.
Common issues include low oil pressure, overheating, and leaks. If oil pressure is low, check the oil pump and pickup tube. Inspect the oil filter for blockages. Overheating may result from air pockets in the cooling system or faulty thermostat. Leaks often occur at gaskets or hose connections. Tighten bolts and clamps as needed.
Use a table to track common problems and solutions:
| Problem | Possible Cause | Solution |
|---|---|---|
| Low oil pressure | Blocked filter, loose parts | Check filter, tighten bolts |
| Overheating | Air in system, bad parts | Bleed system, replace thermostat |
| Fluid leaks | Misaligned gaskets, loose parts | Realign gaskets, tighten clamps |
If the engine makes unusual noises, shut it down and inspect internal parts. Look for signs of wear or improper installation. Use a flashlight to check for loose bolts or missing parts. If you cannot find the cause, consult a repair manual or seek expert advice.
Keep tools and parts organized during troubleshooting. Document each step and result. This practice helps you solve problems quickly and ensures a reliable engine after the rebuild.
Conlcusion
A successful engine rebuild starts with careful planning and organization. Each step, from disassembly to final assembly, requires patience and attention to detail. Double-check measurements and torque values to protect the engine.
Clean all parts before installation. Use a checklist to track progress. DIYers can achieve a reliable engine rebuild with methodical work. Explore manuals, videos, and forums for more guidance. Ask questions and learn from each engine project.