




Testing an engine after rebuilding requires a careful and systematic approach to effectively test an engine’s reliability and safety. Mechanics utilize the best methods to inspect parts, rotate the crankshaft by hand, run compression and leak-down tests, check oil pressure, and follow break-in procedures. Addressing any issues before installation helps prevent future damage.

Visual Inspection Before Testing an Engine
Check for Leaks and Loose Parts
A thorough visual inspection helps catch problems early. Mechanics look for any signs of oil, coolant, or fuel leaks around the engine block, cylinder head, and hoses. They also check for loose bolts, nuts, or brackets that may have been missed during assembly.
Tip: Use a flashlight to inspect hard-to-see areas. Leaks often appear as wet spots or stains on metal surfaces.
A simple checklist can help:
- Inspect all visible joints and connections.
- Wiggle hoses and wires to confirm they are secure.
- Look for drips or puddles under the engine.
Inspect Gaskets and Seals
Gaskets and seals play a key role in engine performance. Mechanics examine the edges of the cylinder head, oil pan, and timing cover for proper gasket placement. They check for pinched, torn, or misaligned seals that could cause leaks.
A table can help organize the inspection:
| Area | What to Check | Signs of Trouble |
|---|---|---|
| Cylinder Head | Gasket fit, seal edges | Oil or coolant seepage |
| Oil Pan | Gasket alignment | Wet spots, leaks |
| Timing Cover | Seal placement | Drips, stains |
If any gasket or seal shows damage, mechanics replace it before moving forward.
Confirm Clean Assembly
Cleanliness prevents future engine problems. Mechanics look for leftover debris, metal shavings, or gasket material inside and outside the engine. They ensure all surfaces are free from dirt and oil residue.
Note: A clean engine reduces the risk of contamination and wear.
They use lint-free cloths to wipe down surfaces. Mechanics also check that no tools or foreign objects remain in or around the engine. This step ensures the engine is ready for mechanical testing.
Manual Rotation & Assembly Checks
Rotate Crankshaft by Hand
Mechanics rotate the crankshaft by hand to check for smooth movement. They use a socket and ratchet on the crankshaft bolt. The crankshaft should turn without binding or sticking.
Tip: If the crankshaft feels tight or locks up, mechanics stop and investigate. This step can reveal assembly errors or internal damage.
A smooth rotation means the pistons, rods, and bearings fit correctly. Mechanics listen for scraping or grinding sounds. These noises may indicate debris or misaligned parts.
Verify Torque Specs
Proper torque ensures engine reliability. Mechanics use a torque wrench to check critical fasteners. They focus on cylinder head bolts, main caps, and connecting rods.
A table helps organize torque checks:
| Component | Torque Spec (ft-lbs) | Checked (✔/✘) |
|---|---|---|
| Cylinder Head | 65 | |
| Main Caps | 80 | |
| Connecting Rods | 45 |
Mechanics compare each fastener to the manufacturer’s specifications. They mark each bolt after confirming the correct torque. This process prevents loose or overtightened bolts.
Listen for Unusual Resistance
Unusual resistance signals a problem. Mechanics pay attention to changes in force while rotating the crankshaft. A sudden increase in resistance may point to a misaligned bearing or a foreign object.
Alert: Mechanics should never force the crankshaft if resistance increases. Forcing movement can cause serious damage.
They check for consistent resistance throughout the rotation. If resistance varies, mechanics inspect the affected area. They resolve any issues before moving to the next test.
A successful manual rotation and assembly check builds confidence in the engine’s internal condition. Mechanics address any problems before starting the engine.
Compression & Leak-Down Tests to Test an Engine
Perform Compression Test
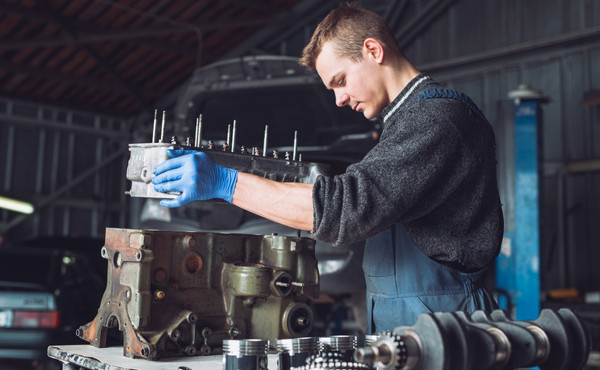
A compression test helps mechanics test the health of an engine before installation. They remove all spark plugs and insert a compression gauge into each cylinder. Mechanics crank the engine and record the pressure readings for every cylinder.
Tip: Mechanics should compare the readings to the manufacturer’s specifications. Consistent readings across all cylinders show that the engine has good sealing and proper assembly.
Low or uneven readings may indicate problems with valves, piston rings, or head gaskets. Mechanics address these issues before moving forward. This step helps seat the rings and ensures the engine will run smoothly.
Conduct Leak-Down Test
A leak-down test provides more detail about engine condition. Mechanics pressurize each cylinder with compressed air and measure how much air escapes. They listen for air leaking from the intake, exhaust, or crankcase.
A table helps organize the results:
| Cylinder | % Leakage | Possible Issue |
|---|---|---|
| 1 | 5 | Normal |
| 2 | 18 | Worn rings |
| 3 | 10 | Minor valve leak |
| 4 | 25 | Head gasket problem |
High leakage points to trouble with valves, rings, or gaskets. Mechanics use this test to test an engine and confirm that repairs are complete. They repeat the test if they find any issues.
Interpret Results
Mechanics use both tests to test the health of an engine. Compression readings should be within 10% of each other. Leak-down results below 15% show a healthy engine.
Alert: If results fall outside the normal range, mechanics must inspect and repair the affected parts.
These tests help seat the rings and confirm that the engine is ready for dynamometer or load bank testing. Mechanics document all results for future reference.
Oil Pressure and Fluid Checks
Prime Oil System
Before starting a rebuilt engine, mechanics prime the oil system. This step ensures oil reaches all bearings and moving parts. Mechanics often use an external priming tool or spin the oil pump with a drill.
Tip: Priming the oil system prevents dry starts and reduces wear on new components.
They check that oil flows from the rocker arms or lifters. Mechanics watch for steady oil movement at key points. This step confirms the system works as designed.
Monitor Oil Pressure on Startup
After priming, mechanics install a mechanical or digital oil pressure gauge. They start the engine and watch the gauge closely. Oil pressure should rise within seconds.
A table helps track oil pressure readings:
| Time After Start | Oil Pressure (psi) | Status |
|---|---|---|
| 0-5 seconds | 30-60 | Normal |
| 6-10 seconds | 20 or less | Investigate |
If oil pressure stays low, mechanics shut off the engine. They check for blockages or incorrect assembly. High oil pressure may signal a stuck relief valve.
Alert: Never run a rebuilt engine with low oil pressure. Immediate action prevents severe damage.
Check for Fluid Leaks
Mechanics inspect the engine for leaks during and after the first run. They look for oil, coolant, or fuel escaping from gaskets, hoses, or fittings. A clean shop floor helps spot drips quickly.
They use a checklist to stay organized:
- Examine all gasket seams.
- Check under the oil filter and pan.
- Inspect coolant and fuel lines.
Mechanics also collect first oil samples on freshly rebuilt engines. These samples reveal metal particles or contaminants. Early detection helps prevent future problems.
Note: Address any leaks or contamination before moving to the break-in procedure.
First Start and Break-In Procedure
Initial Startup at 1500-2500 RPM
Mechanics follow recommended break-in procedures when starting a freshly rebuilt engine for the first time. They set the engine speed between 1500 and 2500 RPM. This range helps oil circulate quickly and prevents low-pressure issues. Mechanics avoid idling the engine for long periods. They keep the RPM steady for at least 20 minutes. This step allows the camshaft and lifters to seat properly.
Tip: Mechanics use a tachometer to monitor engine speed. They adjust the throttle as needed to maintain the correct RPM.
A freshly rebuilt engine needs careful attention during the initial startup. Mechanics check all gauges and watch for warning lights. They record oil pressure, coolant temperature, and RPM readings.
| Parameter | Target Range | Action if Out of Range |
|---|---|---|
| Oil Pressure | 30-60 psi | Shut down and inspect |
| Coolant Temp | 180-210°F | Check cooling system |
| RPM | 1500-2500 | Adjust throttle |
Watch for Unusual Sounds and Leaks
During the first start, mechanics listen for abnormal noises. They pay attention to knocking, ticking, or grinding sounds. These noises may signal problems inside the engine. Mechanics also inspect for leaks around gaskets, hoses, and fittings. They look for oil, coolant, or fuel escaping from the engine.
Alert: Mechanics stop the engine immediately if they hear loud or persistent noises. They investigate the source before continuing.
A freshly rebuilt engine should run smoothly and quietly. Mechanics use a checklist to test an engine for leaks and sounds:
- Listen for knocking or ticking.
- Inspect all gasket seams for wet spots.
- Check under the engine for drips or puddles.
- Monitor fluid levels during operation.
If mechanics find any leaks or abnormal sounds, they address the issue before moving to the next step. This careful approach helps prevent damage and ensures the engine is safe to operate.
Break-In at 75% Load
After the initial startup, mechanics begin breaking in a rebuilt engine under load. They gradually increase the engine load to about 75% of its rated capacity. This process helps piston rings seat and improves overall performance. Mechanics avoid full-throttle operation during the break-in period. They vary engine speed and load to promote even wear.
Note: Mechanics follow manufacturer guidelines for break-in duration and load levels.
A table outlines the steps for breaking in a rebuilt engine:
| Step | Action | Purpose |
|---|---|---|
| Warm-Up | Run at 1500-2500 RPM | Circulate oil |
| Load Increase | Raise to 75% load gradually | Seat piston rings |
| Speed Variation | Change RPM every few minutes | Prevent glazing |
| Inspection | Check for leaks and noises | Ensure reliability |
Mechanics test an engine throughout the break-in process. They monitor oil pressure, coolant temperature, and listen for changes in sound. A freshly rebuilt engine requires patience and attention to detail. Mechanics complete the break-in period before considering the engine ready for regular use.
Conclusion
Testing a rebuilt engine involves several important steps. Mechanics inspect for leaks, rotate the crankshaft, check compression, monitor oil pressure, and follow break-in procedures. They address any issues before installation to ensure reliability.
Checklist for Engine Testing:
- Inspect for leaks and loose parts
- Rotate crankshaft by hand
- Verify torque specs
- Perform compression and leak-down tests
- Prime oil system and check oil pressure
- Monitor for unusual sounds and leaks during break-in
Tip: If mechanics find low compression, leaks, or abnormal noises, they should stop and investigate. Resolving problems early prevents engine damage.